
Like thousands of other people, I was very affected by the Blue Planet film showing the plastic soup that are our Oceans, and have been trying to think of ways to reduce our plastic use ever since
How to reduce my plastic use?
It’s really difficult to think of ways to reduce it, like what can I do about toothpaste in tubes, shampoo in bottles or lycra in clothes. Nothing is black and white in green issues (see what I did there!). Clothes without lycra all have their own issues. Cotton, for instance, uses a lot of resource to grow. I try to get green groceries that are not in plastic bags, taking cloth bags with me, and recycle everything that it’s possible to recycle. I don’t use ready meals, so save packaging there. I often buy second hand clothes from charity shops, and we compost everything that isn’t used in the kitchen. We also compost waste paper, although not all of it, and burn waste wood, although that has issues around air particulates.
I’ve just bought a charger that fits onto my phone, like a case. It came in a sturdy cardboard box, with plastic film, inside a sealed bag (black, so not recyclable), inside another cardboard box. There’s not a lot I can do about that kind of packaging
What CAN I do to reduce my plastic use?
One of the things I can do is not use cling film, which isn’t recyclable. When covering bowls with food in them, I often use a dinner plate or tea-plate, or even a tea-towel.

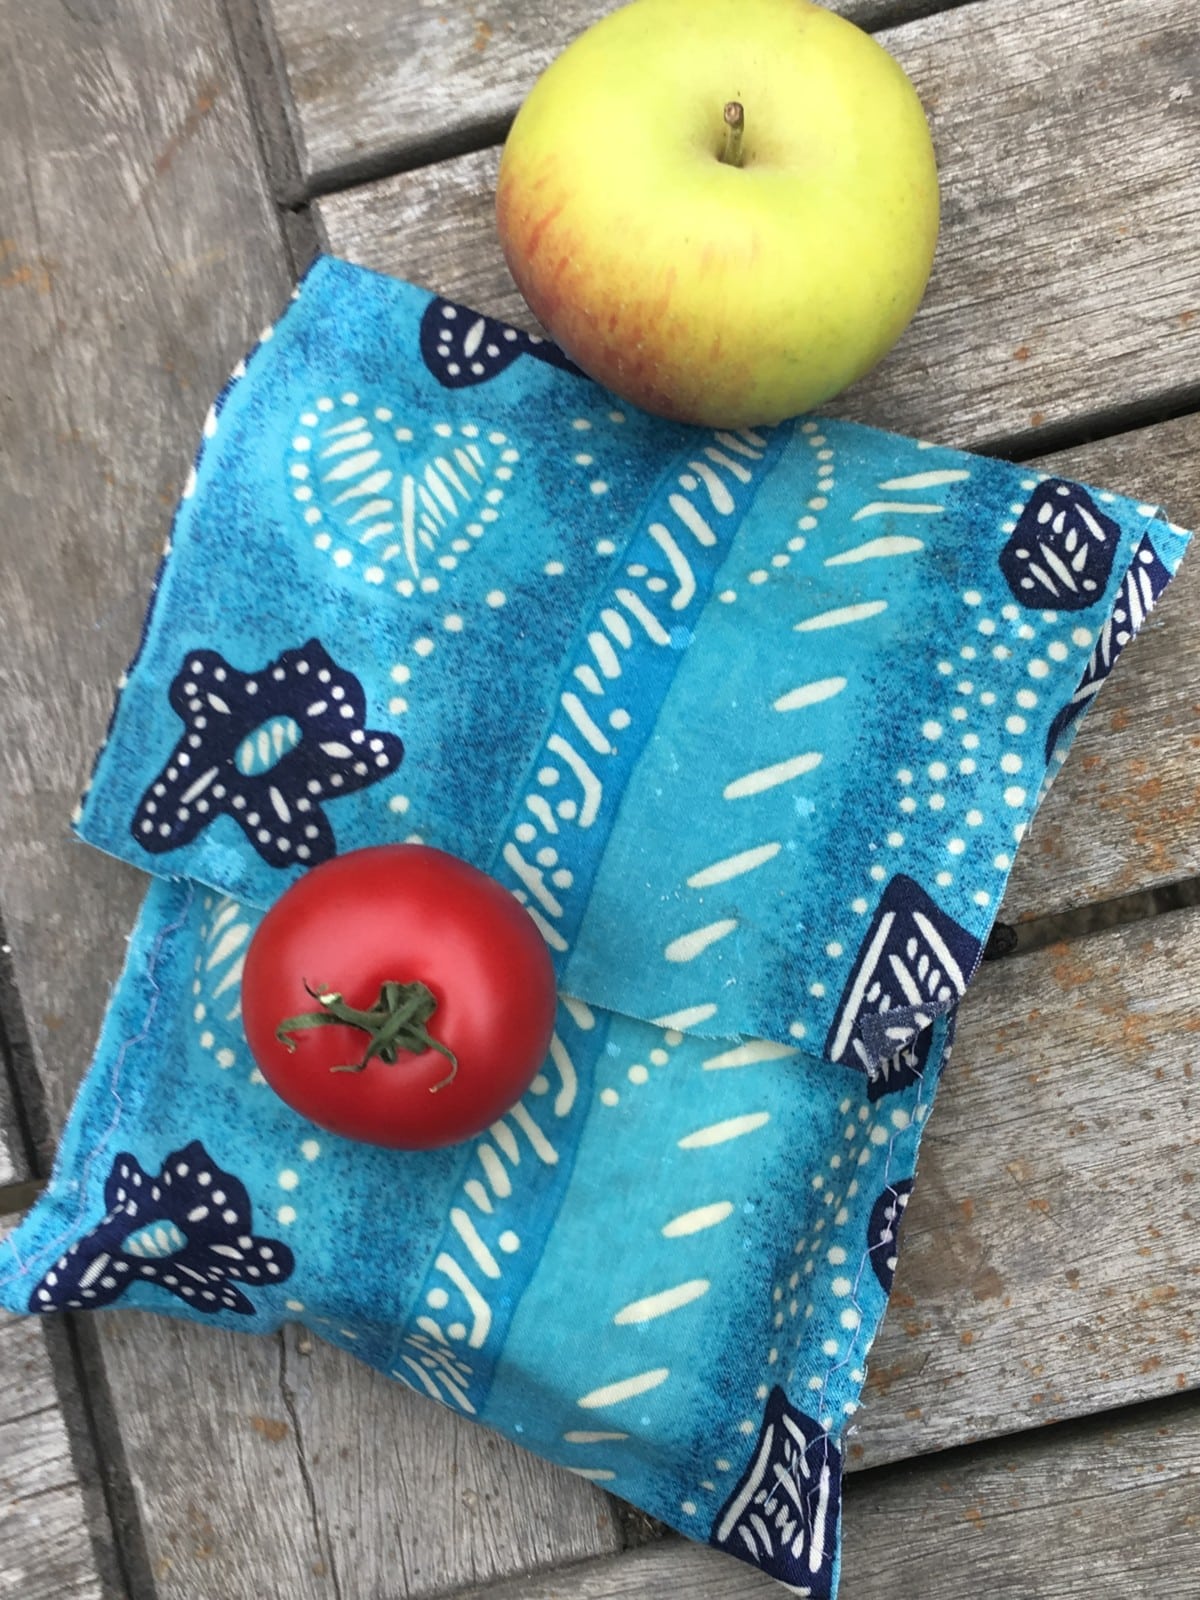
If I don’t want to do that for whatever reason, a great alternative is to use wax food wraps. These can be used to wrap many things – in the packed lunch box, in the fridge and to cover bowls. They just need the warmth from your hands to mould them into the shape of the item you are covering They are a popular item now and sold on the like of Etsy and Amazon for £12-£15 or so, often in sets of five. A small one, a medium sized one and three larger one, like these ones. Although the sizes usually seem a little on the small side to me

There is also a thing I haven’t seen before where you can buy a metre of it, so you can cut it to whatever size you like, this one measures 13″ x 35″ / 33cm x 13cm, so not very wide, but pretty good to get the size you prefer. Sizes differ, but packs are usually this kind of size – 5 wraps or 33cm or so of a length of waxed fabric.

Making your own beeswax wraps
I decided to have a go at making some myself. After a bit of a Google, it all seemed fairly simple. I just needed some wax and a few pieces of fabric. That’s got to be pretty green, right? Well, I have loads of bits of suitable fabric of various sizes, from various projects, so that bit wasn’t very difficult at all. The wax came from Amazon. As at April 2024, this is £9.95 for 200g, but you only use tiny amounts to make a set of wraps, just a teaspoon or two, so that pack would last literally years. The completed wraps cost just pence to make, so massively cheaper than buying them.
You could of course buy beautiful fat quarters

A finished wrap will last at least a year, probably two years. They can be gently re-warmed in the oven, or, underneath a sheet of greaseproof paper, by an iron. Add a tiny bit more wax if it’s needed. Too much, and your wrap will feel clumsy and be thick. If you do accidentally make it a bit too thick, get another piece of fabric and either wrap both pieces up tightly and warm in the oven, or iron between greaseproof paper to distribute the wax over the extra fabric.
For flat beeswax wraps
- First decide on the size of wrap you would like. Most purchased packs of beeswax wraps come in a pack of five to include a small (7 x 8 inches), medium (10 x 11 inches) and 3 x large (12 x 14 inches). Sizes differ, but they are usually this kind of size, so perhaps start there.
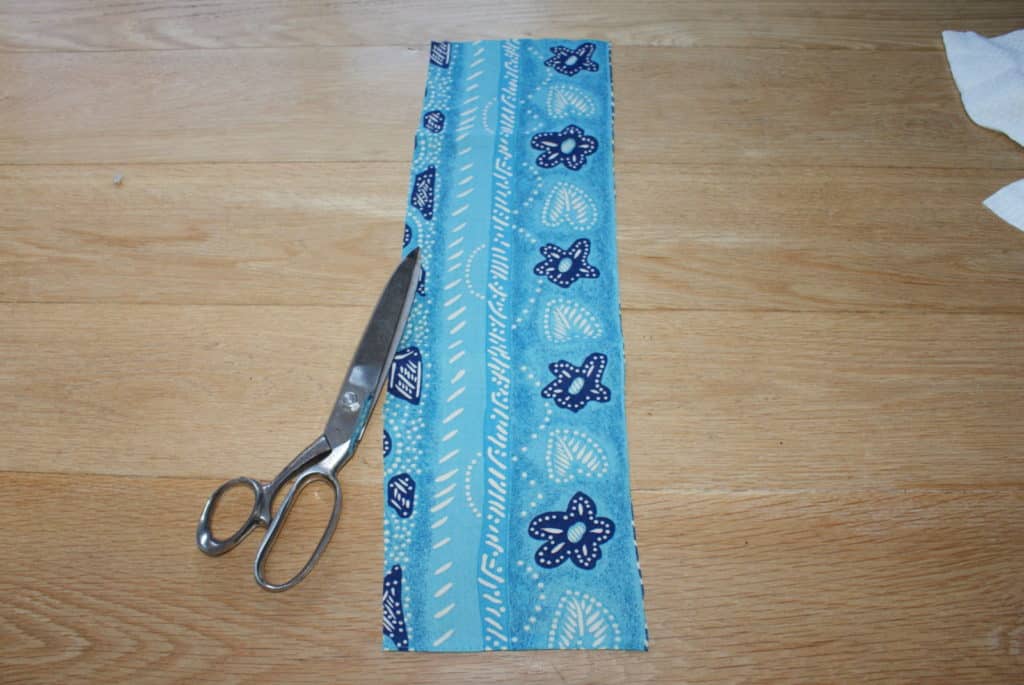
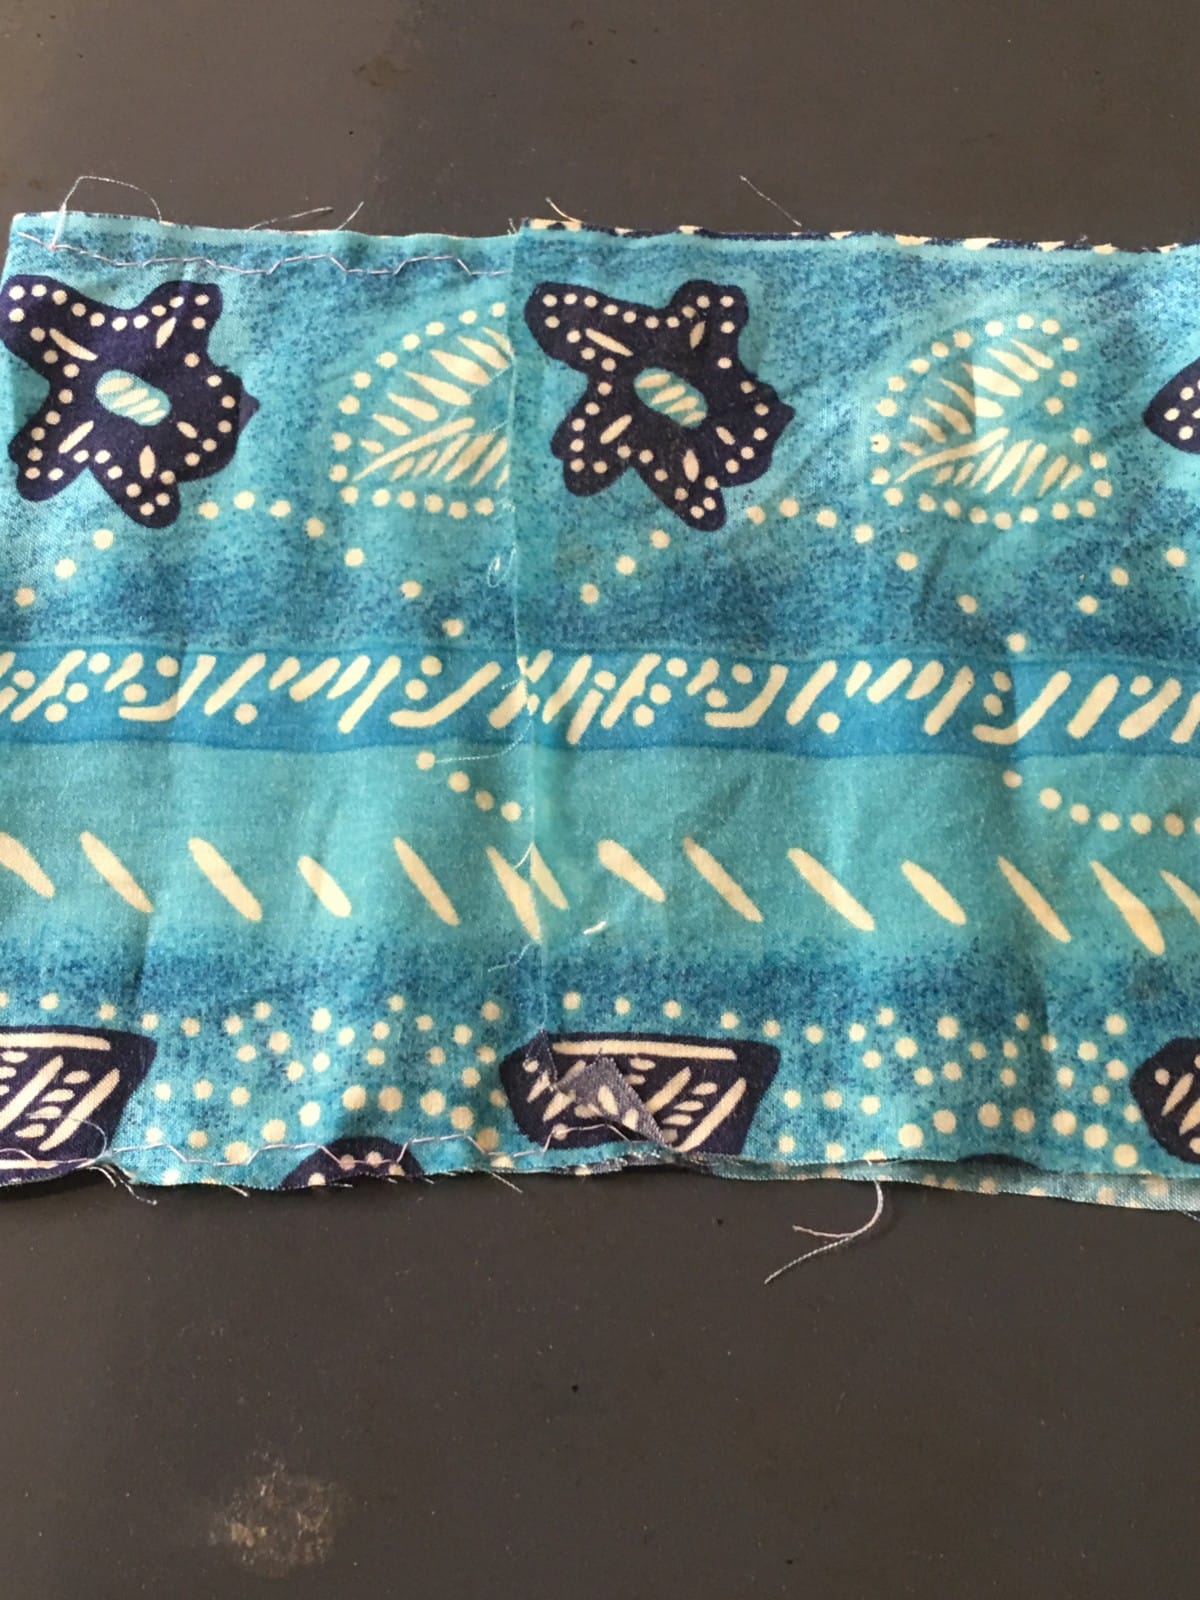
- Cut your fabric to size. Trim off any fraying bits. It doesn’t matter at all if they are uneven or wobbly. The wax stops the fabric fraying, so you could trim off any loose threads later if you like
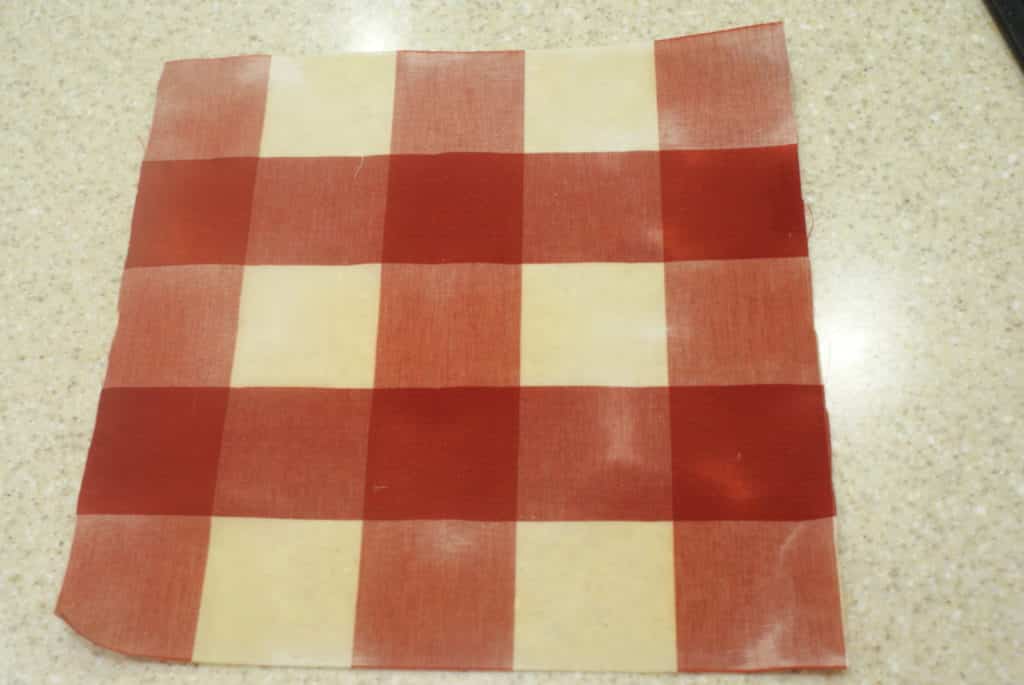
- In these ones, the red check one is 14½”/37cm square.
- The blue spotted one is 10½”/27cm
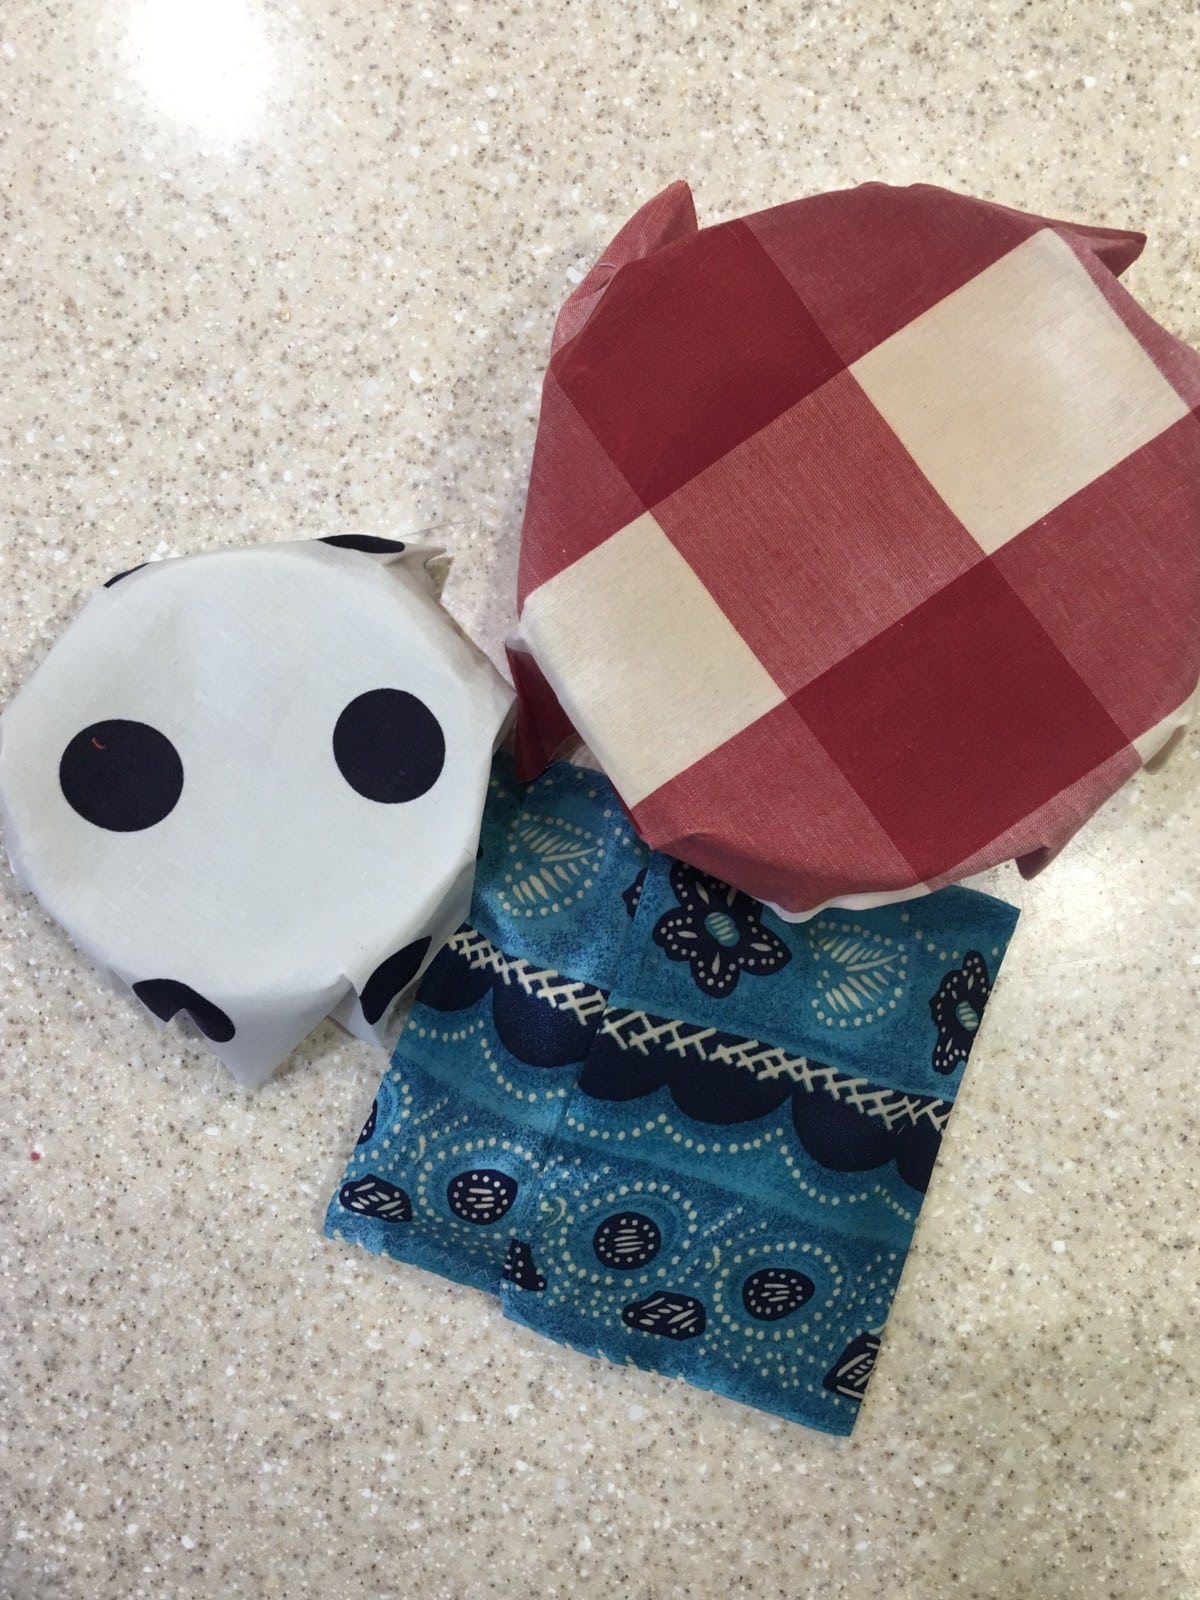
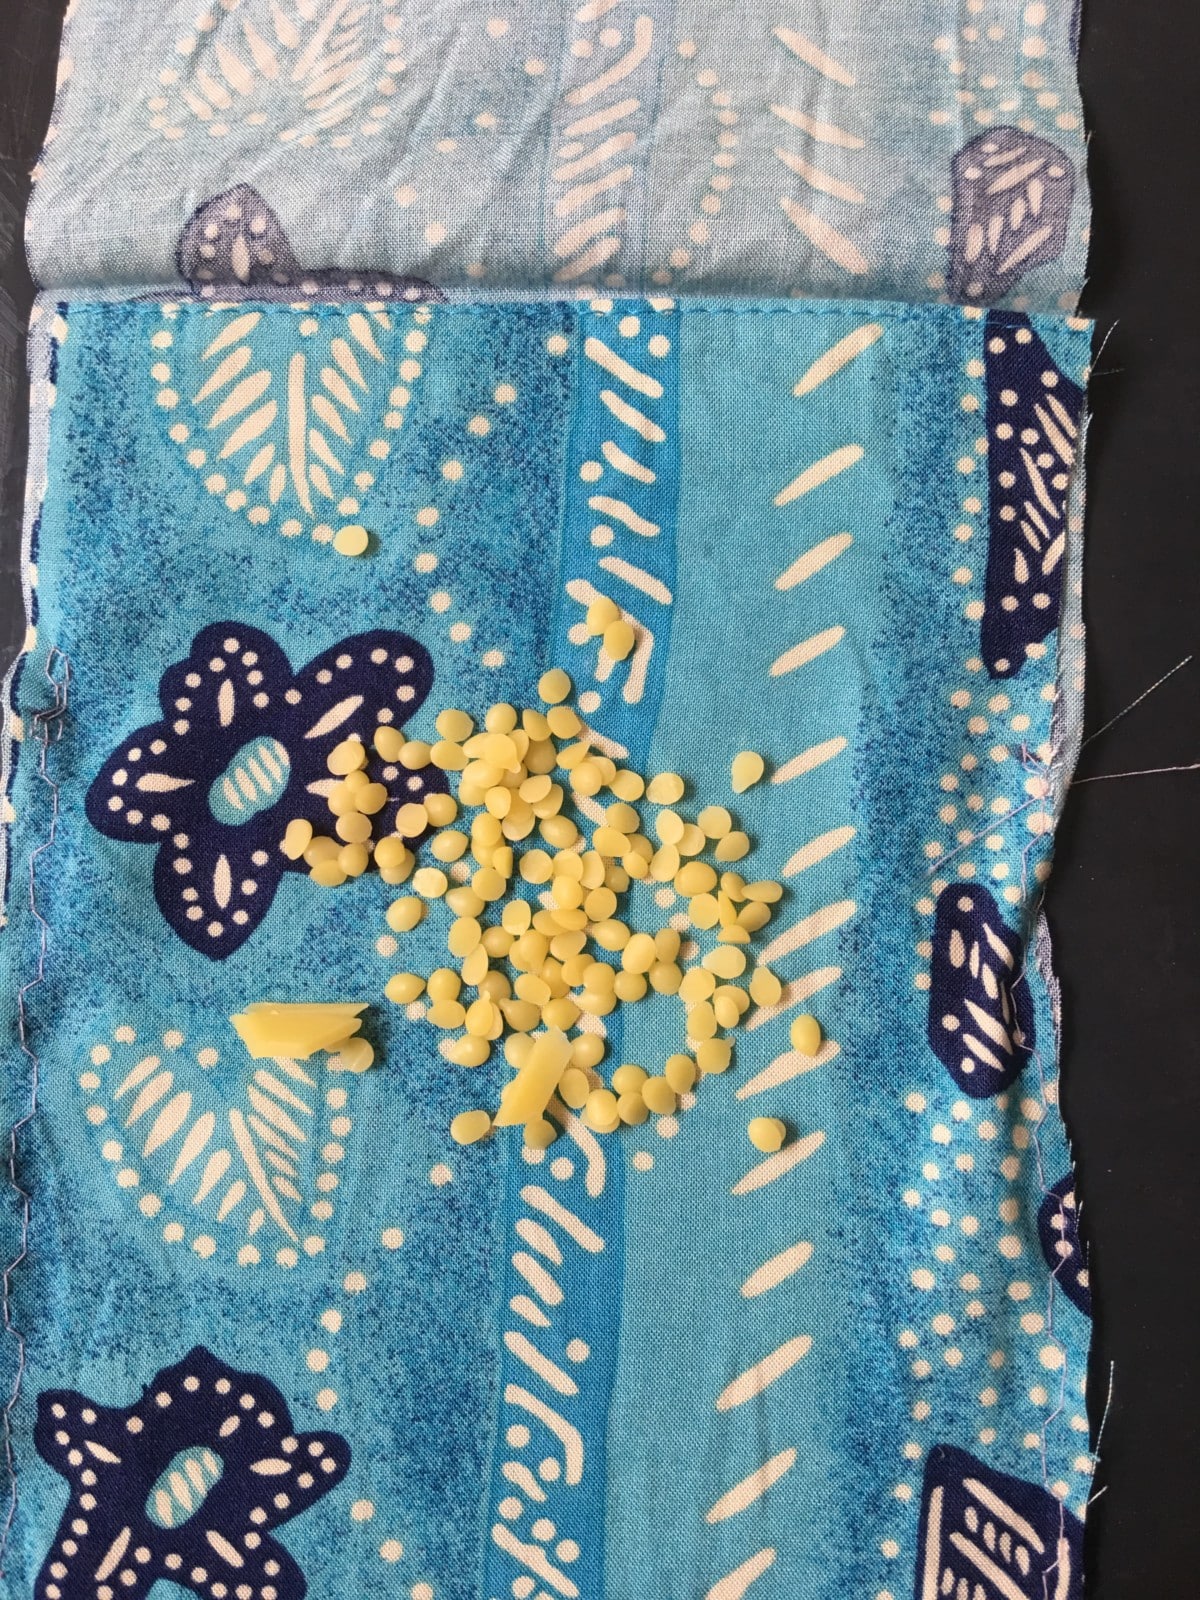
- Put the fabric on a baking tray and sprinkle with a very small amount of wax granules, a quarter tsp per sheet. Don’t be tempted to use more or your wax wrap will be too thick
- Place in a warm oven for 5 minutes
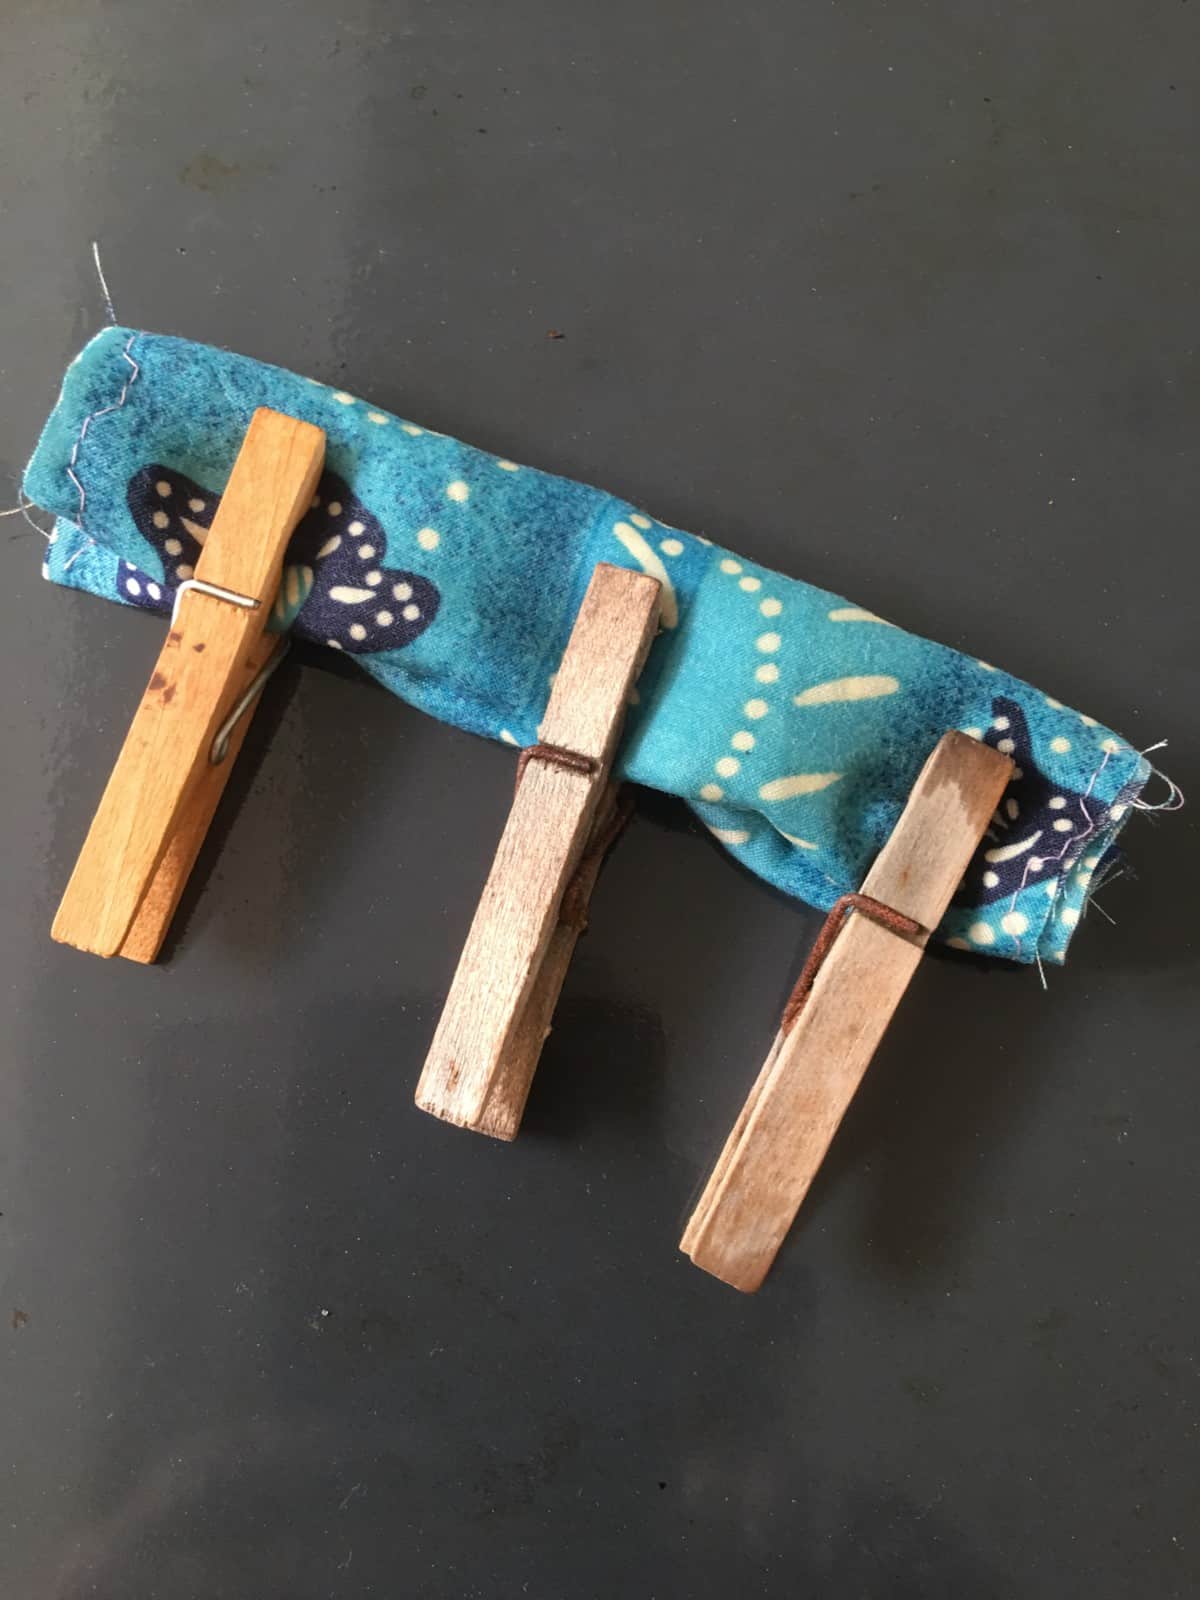
- You’ll probably need to roll the fabric and rewarm it a couple of times to make sure all the fabric is waxed. I found pegs very handy for this stage. Also at this stage, you can evaluate if you need more wax or not
- To use your wax wraps, wrap the item, bowl etc and warm by wrapping your hands around it. The warmth from your hands will melt the wax enough to re-shape it sufficiently to wrap your item
-
Alternative Method
- Another way of doing this is to place your fabric on a sheet of greaseproof paper on an ironing board, sprinkle on the wax, cover with another sheet of greaseproof paper and press with a hot iron
- You’ll need to repeat the ironing a few times, folding the fabric so the wax can penetrate all parts of the fabric. Make sure you keep the sides of the greaseproof paper with wax on it facing inwards, or the wax will melt onto the soleplate of the iron
To Make A Beeswax Sandwich Bag
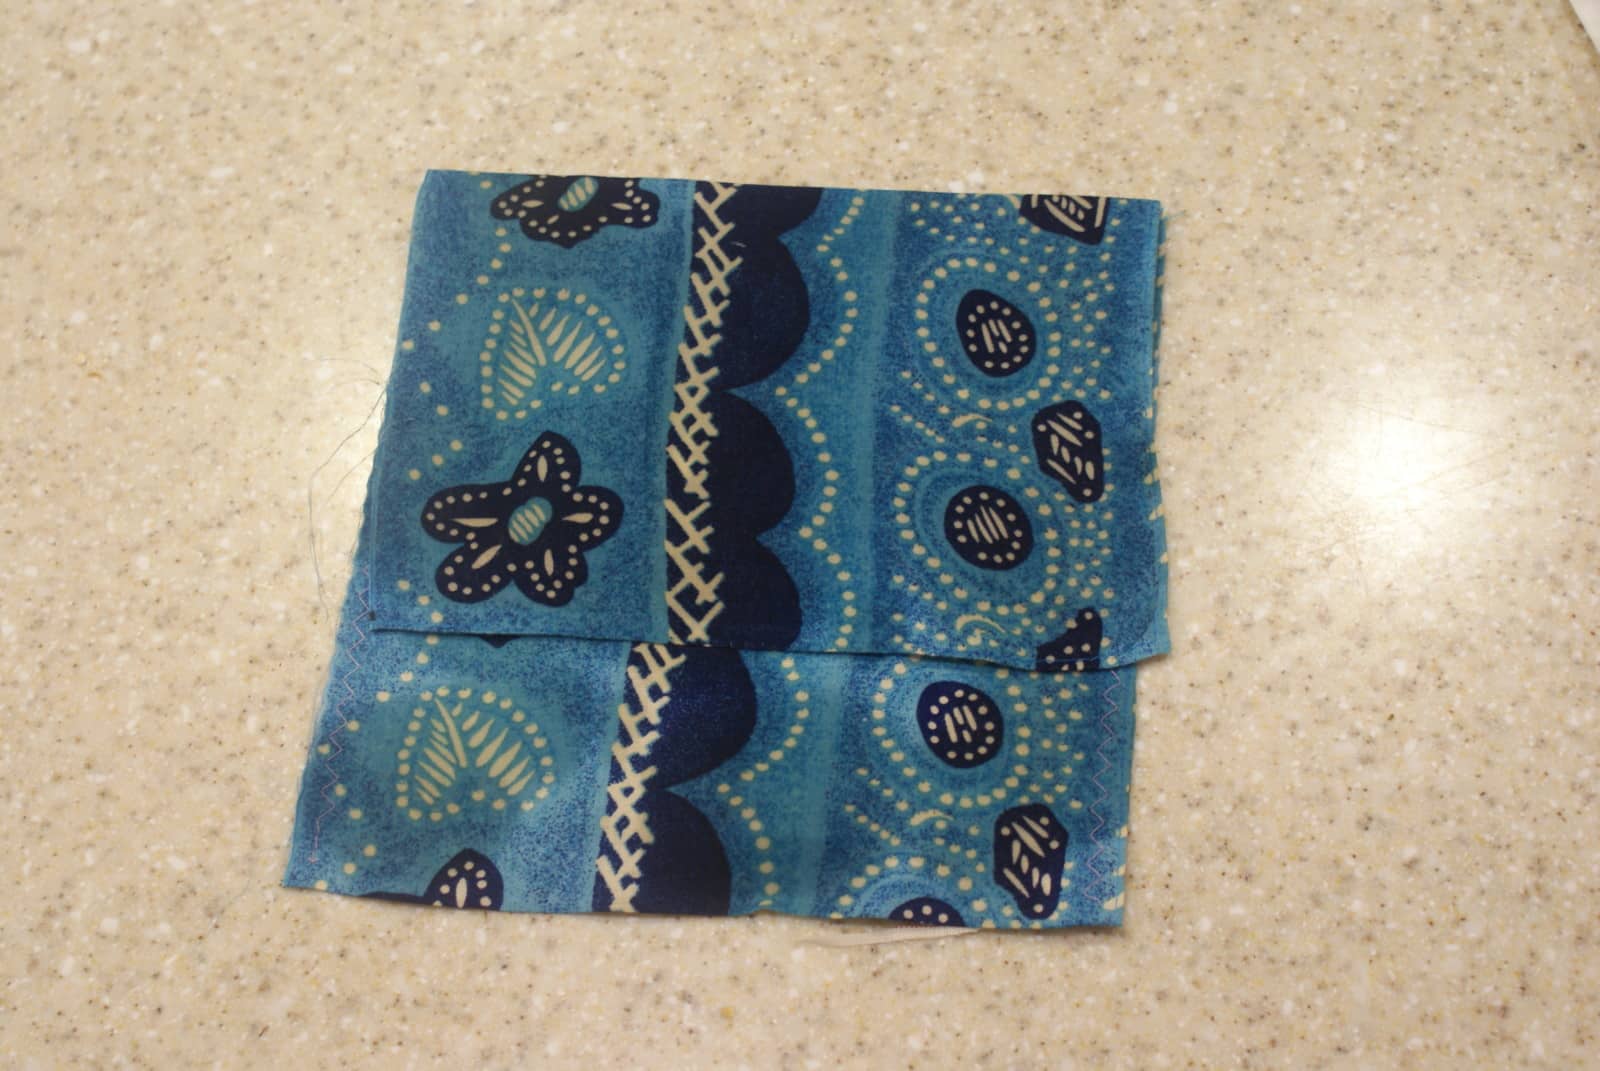
- Cut your fabric to an rectangle, with measurements of 22″ x 8″, 55cm x 20cm

- Fold your fabric so that 8″ / 20cm of the short edge side is laid on top of the remaining fabric. This should give you a double layered piece a little larger than the size of a whole slice of bread. The remaining single layer of fabric is for a flap. Sew up the edges, forming the bag. I also chose to neaten up the top edge by folding over and sewing a line of stitching, but you don’t have to.
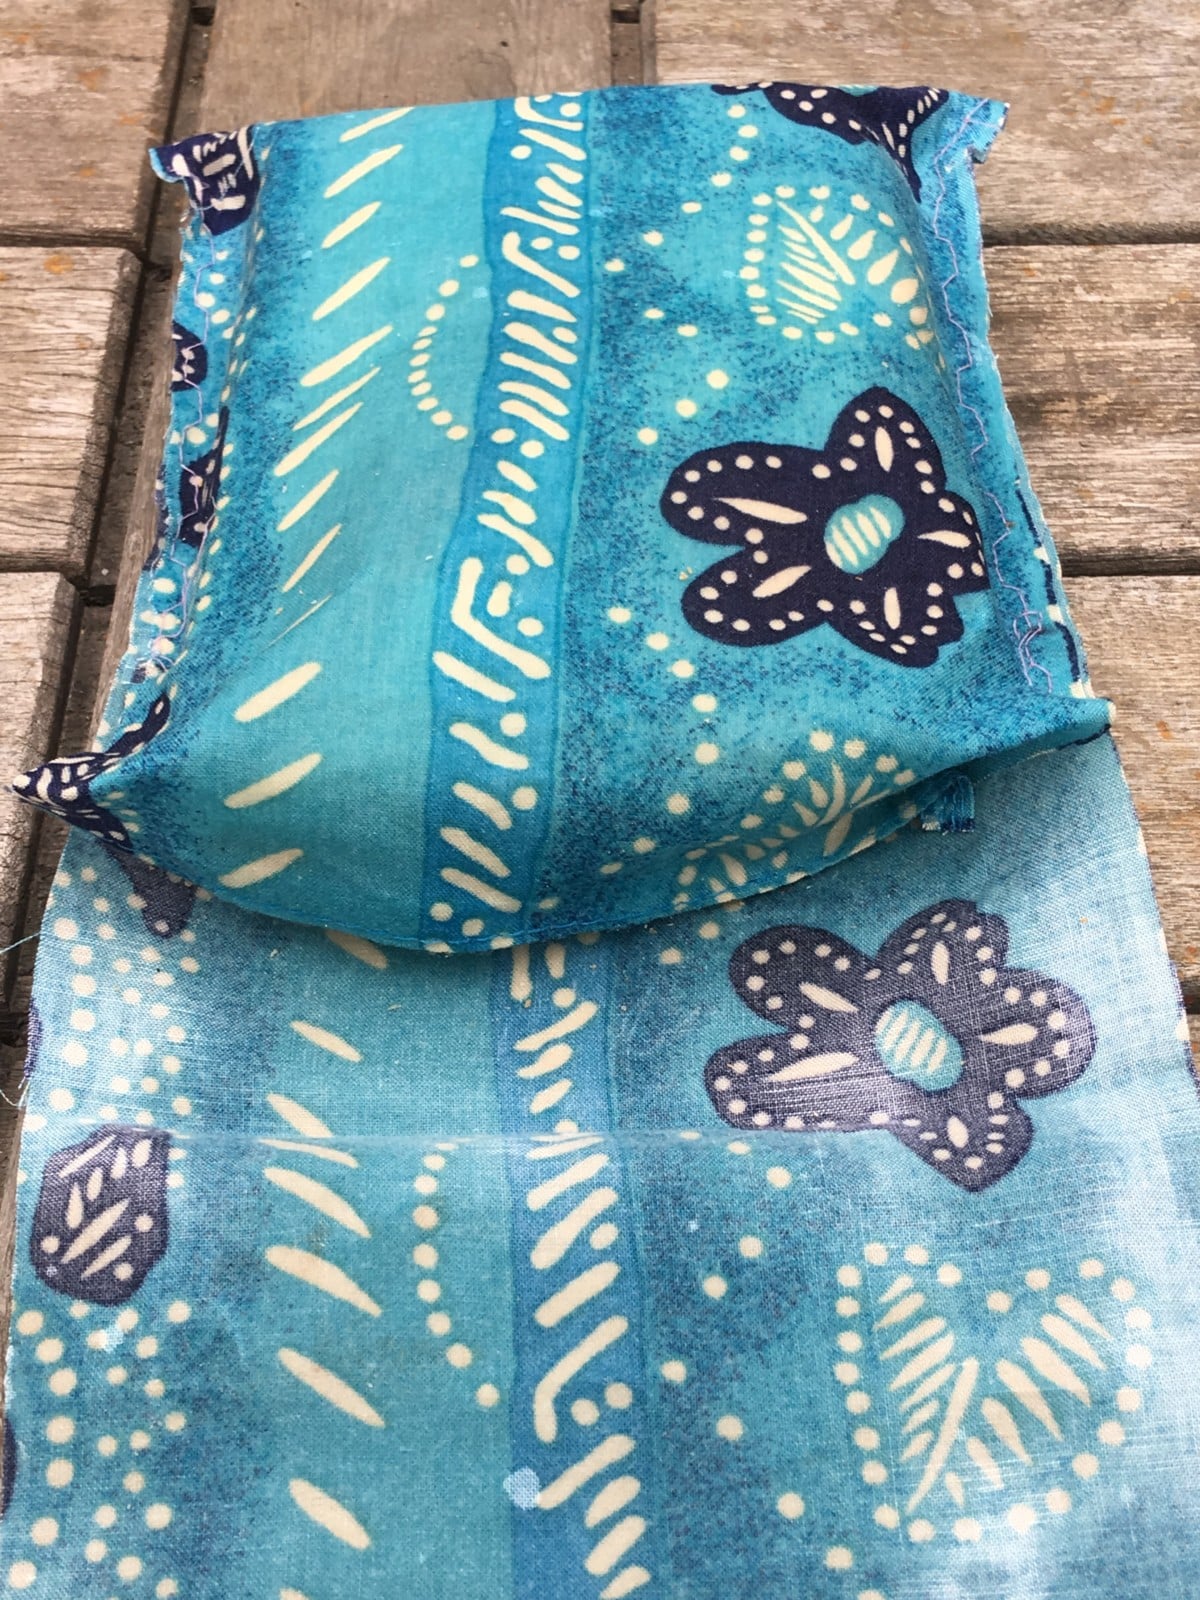
- Sprinkle on 1 tsp of wax granules. Don’t be tempted to use more, or your finished bag will be very thick. Now wax your fabric as above
- As soon as your waxed sandwich bag comes out of the oven, make sure it’s waxed all over, on both sides. You will probably have to squish it together, roll it up, or secure with pegs, then reheat, to make sure that all the fabric is waxed
-
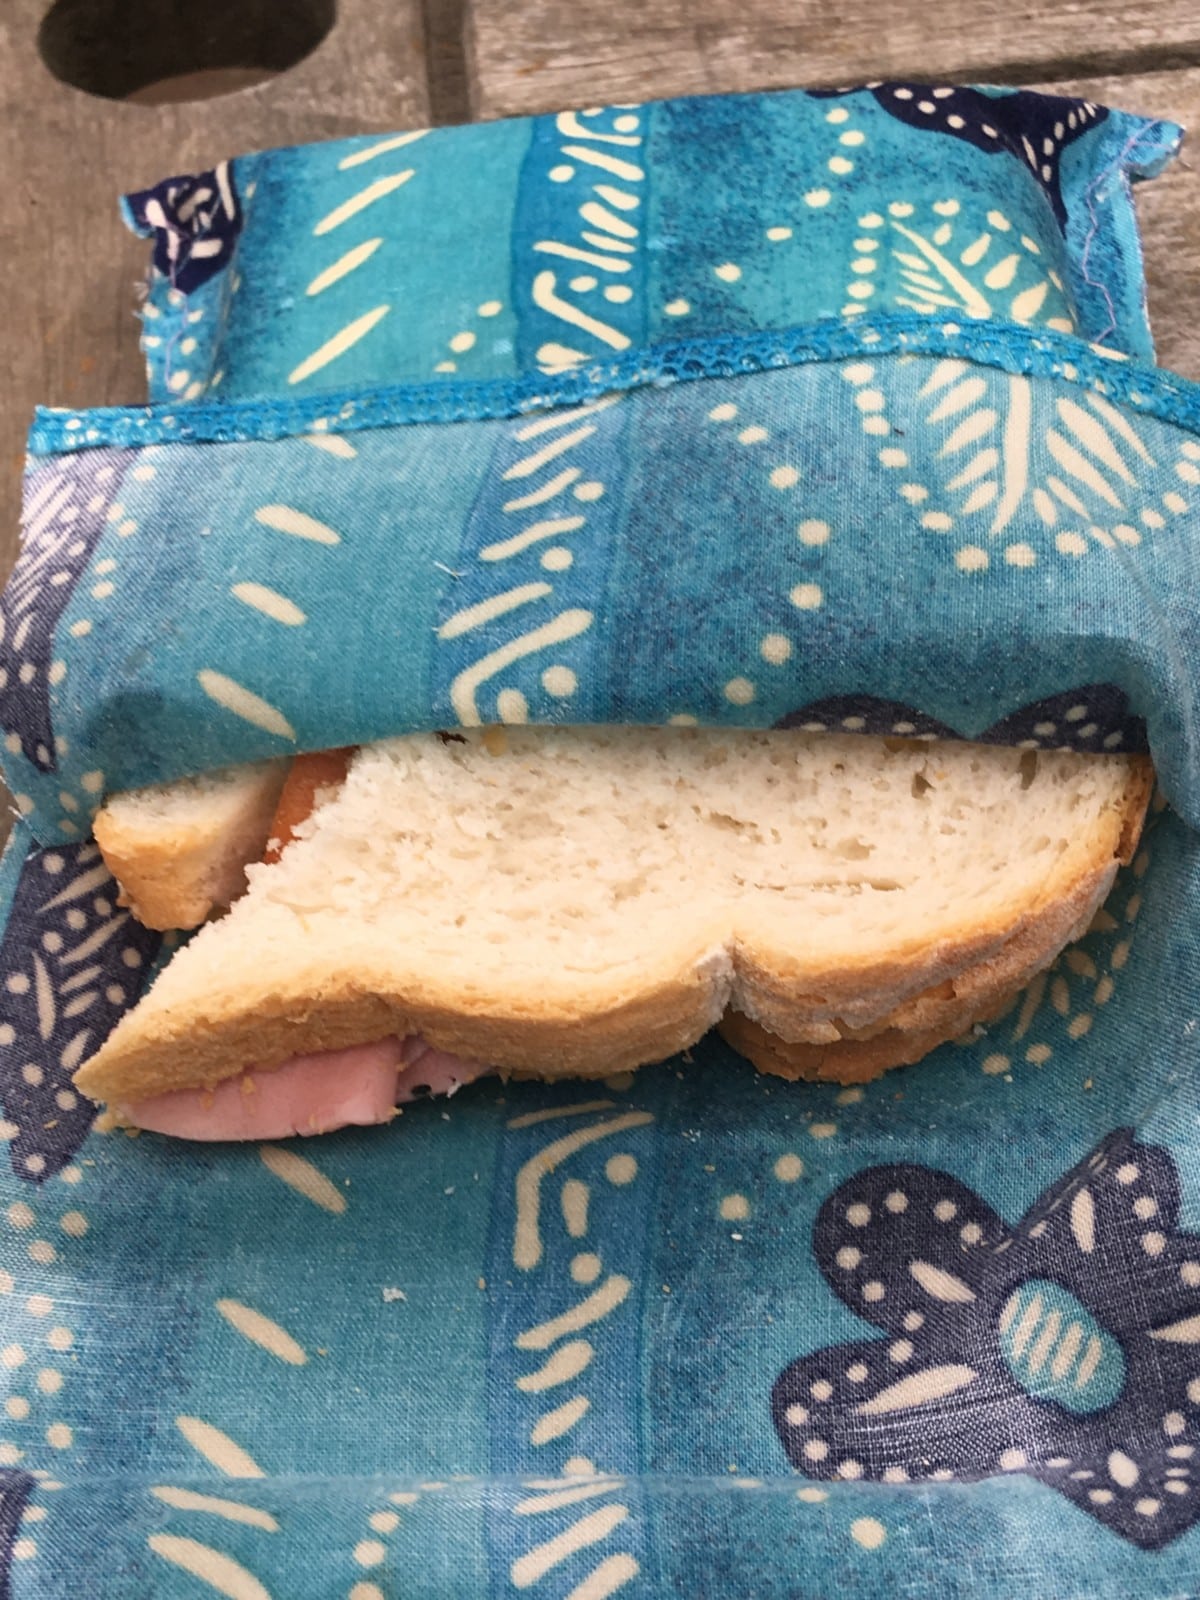
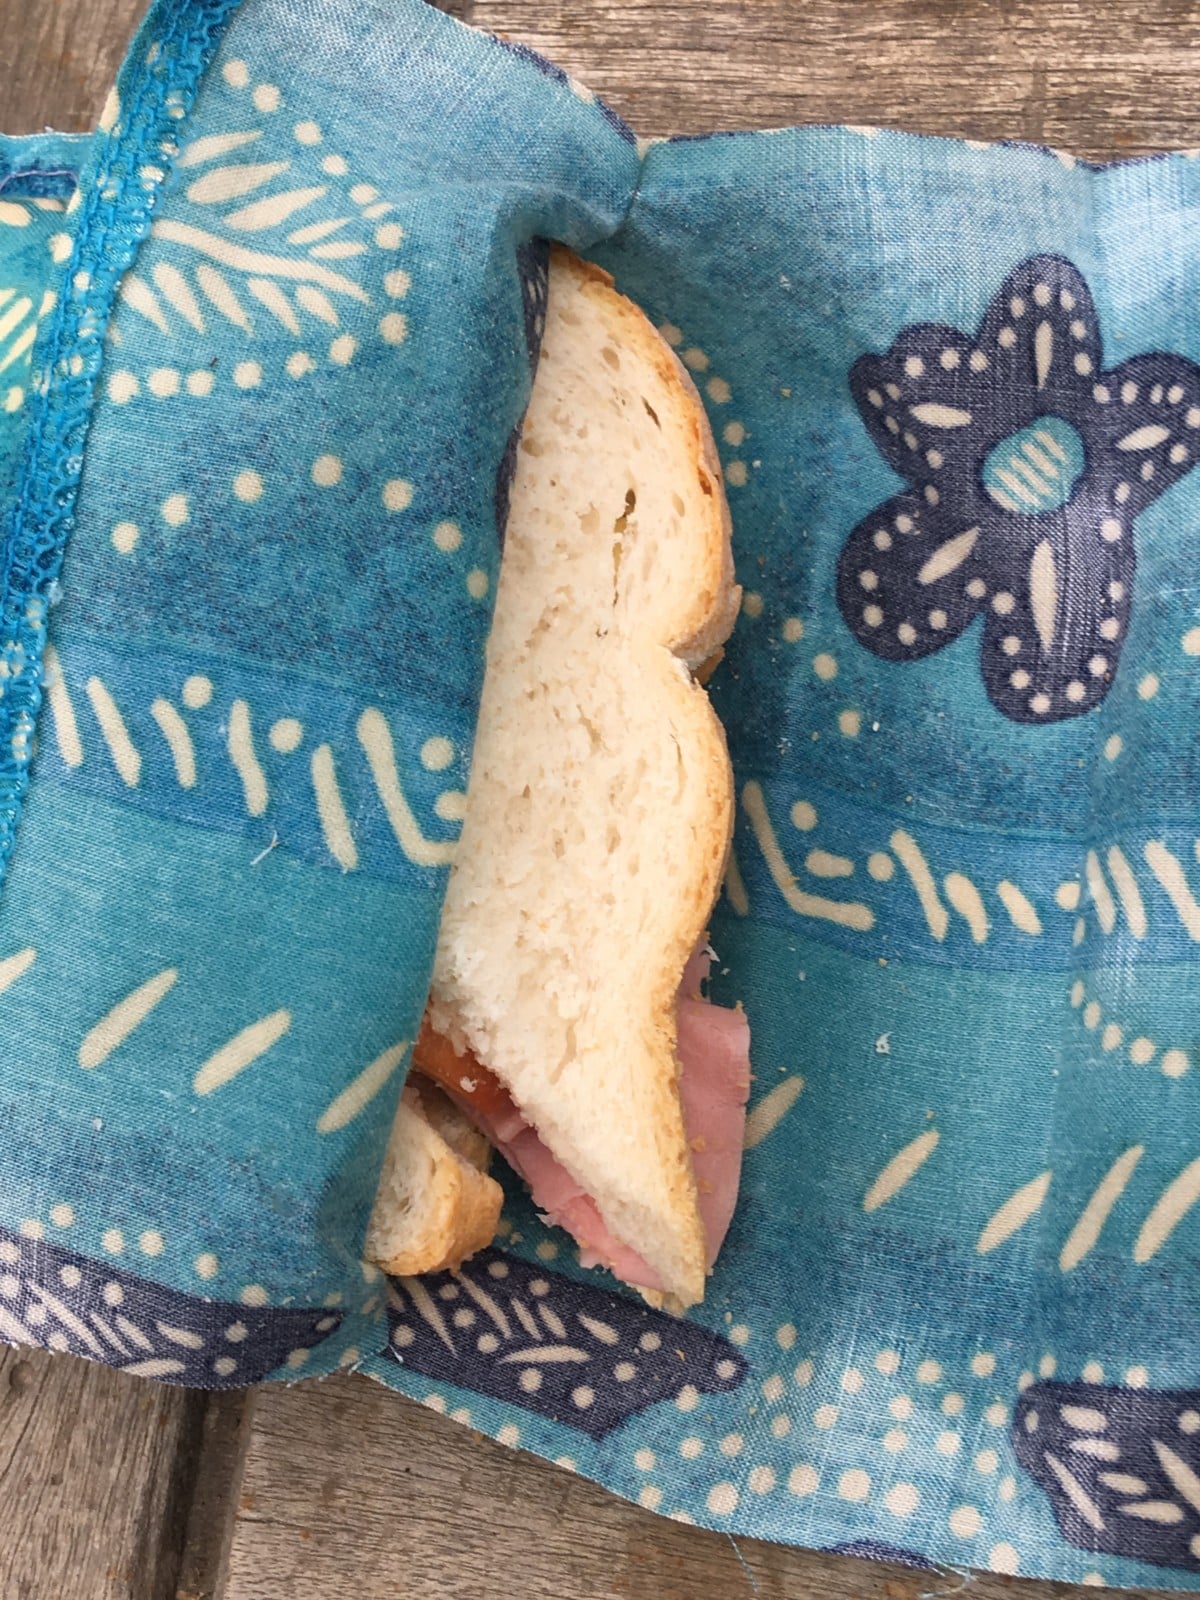
- Your bag is ready to use as soon as it’s cold. Place your sandwich inside the bag and tuck in the flap. Not just for sandwiches of course
- After use, do not wash your wax wraps in hot water, brush them out and rinse in cold water. With care, they should last 12-24 months. If they look like they need it, gently re-warm in the oven.
- Wax wraps should last about 1-2 years. Once worn, it might just need a little warm in the oven, or you can add a tiny bit more wax and re-warm. Too much makes them too thick, so be sparing

Equipment needed
- and
- or
Ingredients
- 10 g beeswax from a 300g pack
- 3 pieces fabric scraps, close woven cotton from your stash, or beautiful fat quarters
- 1 piece fabric scrap for a sandwich bag
- 2 pieces greaseproof paper larger than your largest wrap
Instructions
For flat beeswax wraps
- First decide on the size of wrap you would like. Most purchased packs of beeswax wraps come in a pack of five to include a small (7 x 8 inches), medium (10 x 11 inches) and 3 x large (12 x 14 inches). Sizes differ, but they are usually this kind of size, so perhaps start there. Purchased packs cost around £10-£15 for 5 squares, so this is massively cheaper
- Cut your fabric to size. Trim off any fraying bits. It doesn't matter at all if they are uneven or wobbly. The wax stops the fabric fraying, so you could trim off any loose threads later if you like
- I used a red check one of 14½"/37cm square and a blue spotted one of 10½"/27cm
- Put the fabric on a baking tray and sprinkle with a very small amount of wax granules, a quarter tsp per sheet. Don't be tempted to use more or your wax wrap will be too thick
- Place in a warm oven for 5 minutes
- You'll probably need to roll the fabric and rewarm it a couple of times to make sure all the fabric is waxed. I found pegs very handy for this stage. Also at this stage, you can evaluate if you need more wax or not
- To use your wax wraps, wrap the item, bowl etc and warm by wrapping your hands around it. The warmth from your hands will melt the wax enough to re-shape it sufficiently to wrap your item
Alternative Method
- Another way of doing this is to place your fabric on a sheet of greaseproof paper on an ironing board, sprinkle on the wax, cover with another sheet of greaseproof paper and press with a hot iron
- You'll need to repeat the ironing a few times, folding the fabric so the wax can penetrate all parts of the fabric. Make sure you keep the sides of the greaseproof paper with wax on it facing inwards, or the wax will melt onto the soleplate of the iron
To Make A Beeswax Sandwich Bag
- Cut your fabric to an rectangle, with measurements of 22" x 8", 55cm x 20cm
- Fold your fabric so that 8" / 20cm of the short edge side is laid on top of the remaining fabric. This should give you a double layered piece a little larger than the size of a whole slice of bread. The remaining single layer of fabric is for a flap. Sew up the edges, forming the bag. I also chose to neaten up the top edge by folding over and sewing a line of stitching, but you don't have to.
- Sprinkle on 1 tsp of wax granules. Don't be tempted to use more, or your finished bag will be very thick. Now wax your fabric as above
- As soon as your waxed sandwich bag comes out of the oven, make sure it's waxed all over, on both sides. You will probably have to squish it together, roll it up, or secure with pegs, then reheat, to make sure that all the fabric is waxed
- Your bag is ready to use as soon as it's cold. Place your sandwich inside the bag and tuck in the flap. Not just for sandwiches of course
- After use, do not wash your wax wraps in hot water, brush them out and rinse in cold water. With care, they should last 6-12 months. If they look like they need it, gently re-warm in the oven.

I wish I had read Su’s comment about white fabric. I have used beige and white check which looks a bit grubby but I will use. I can’t get wax beads here so holidaying in Lebanon I bought sheets of two grades of sheets of wax. Cut in strips they are perfect now I have used coloured fabric.
Ooh, not nice!
They just went a nasty yellow coloured, so they looked rather like dirty handkerchiefs!
The first ones I made were white, but they photographed terribly, so I used pattern fabric. I really like the fat quarter type fabric, but I’ve got masses of fabric already and wasn’t prepared to buy some especially
The white ones look fine to use, although I made them rather small. How did yours turn out so that you were so unhappy with them, are they patchy or something?
I made some a while ago, but I don’t use them because I stupidly used white fabric, well it looks awful as you can imagine. I think I’ll make some more using your iron technique and patterned fabric this time!